The various camera modules that can be attached to a Raspberry Pi always fascinated me. The marriage of a computer and an imaging sensor opens up endless possibilities, particularly if the components are treated as an open, modular system. Many camera manufacturers lock in the components at the time of design and manufacture and only firmware updates can add/correct features. Enter the Pi! With a variety of camera modules from 5 megapixels to the latest ones, as of 2020, that include little over 12 megapixels, a lot of photons can be captured. Ten years ago, my Canon 5D had 12 megapixels. I understand that we can’t compare the Canon 5D to the Raspi’s camera module as we can’t compare apples and raspberries. However, the camera module is only one component of a system. I can do things in software instructing the camera module that I could not even dream of coercing the 5D to do.
Although all it takes is to connect a ribbon cable between the Pi and a camera module, the contraption is not conducive to taking pictures. Too many fiddly things that can pull out, bend, break…ask me how I know. Besides, I enjoy the experience of making a photograph, not just the end product. Something tangible in my hand, a preview of an image, a press of a button. Hence, the idea of putting all the wires into a shell that unifies all that into a system. I mean, how often can you tell your photographer friends before snapping a photo: “Wait, I need to boot up my camera!”
Thus, the concept was born of a hand-held camera, with a nod to a respectable Scandinavian camera manufacturer, that replaces the waist-level viewfinder with an LCD touch screen and the film with an imaging sensor. The design was such that it takes four little screws to remove the camera module and replace it with another one. We can do NoIR or regular. Your choice. Currently, I have a NoIR camera module attached.
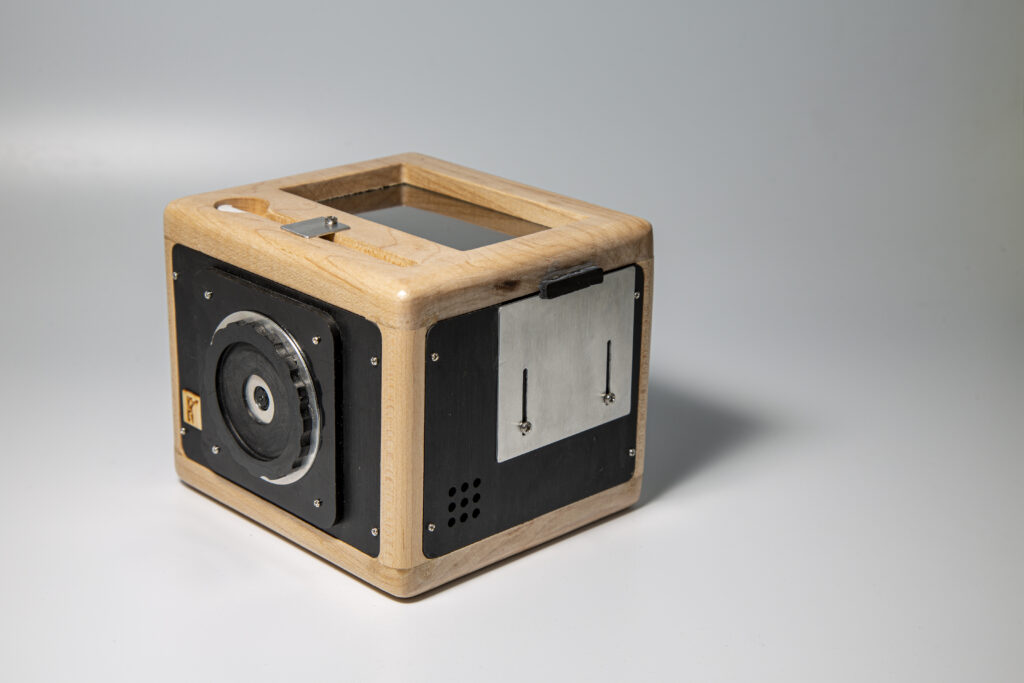
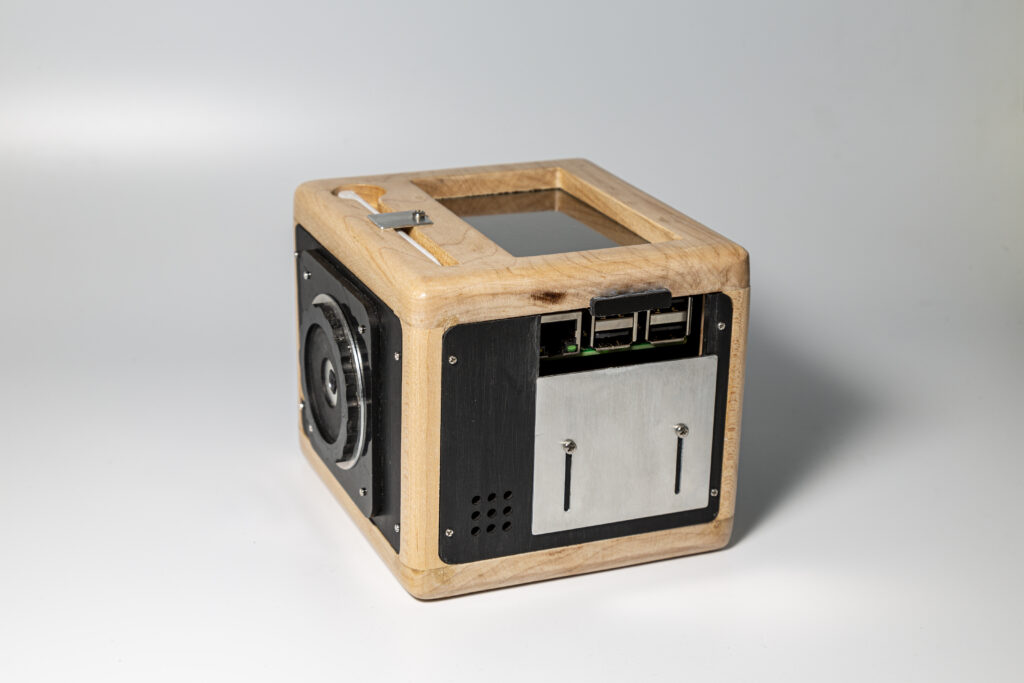
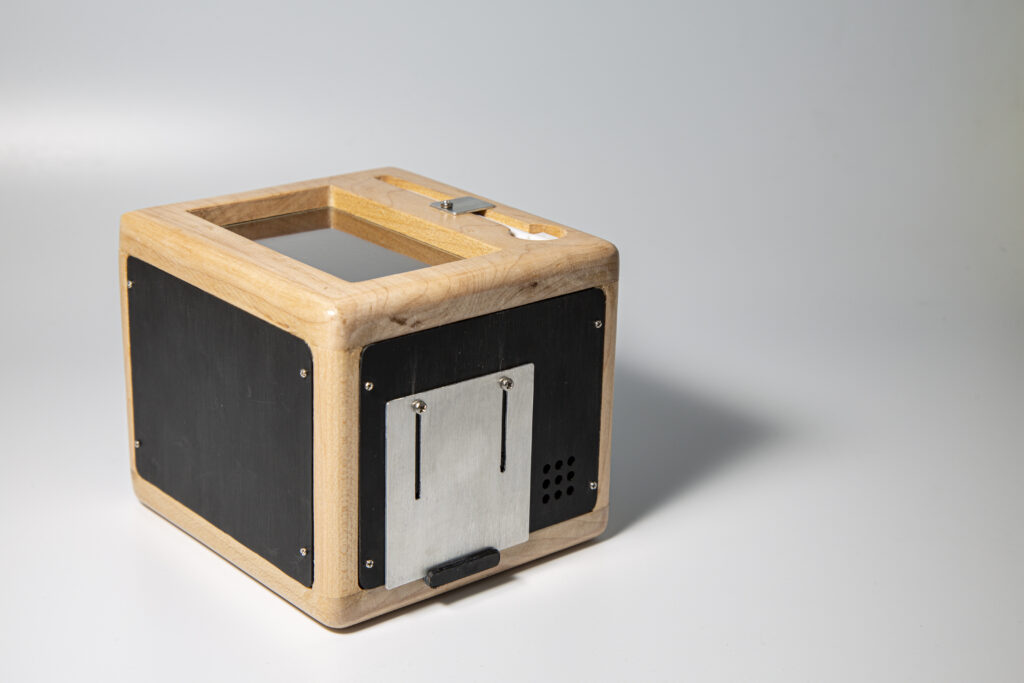
Let’s look at the design first, the givens and druthers. I wanted something handheld and portable, something I can lay in my palm with a firm grasp. I wanted to see a preview before I press a button. Thus, the mode of preview became an LCD screen, where the touch of a finger or a stylus replaces the tactile buttons of a camera. Portability is ensured by an enclosed rechargeable battery. All the ports of the Pi are accessible through a brushed aluminum panel that can be slid away. One can attach a WiFi USB stick, mass storage, anything that can be plugged in to a USB port. Similarly, a rechargeable battery supplies power to the system creating a truly mobile solution. The battery can be easily attached or detached through another brushed aluminum panel. To top things off, a 4” touch LCD screen is mounted on the top and a recess is milled out of thllllle birch to hold the stylus handy.
I admit I am not good at finding names for things. The camera was made of black ABS plastic and birchwood, hence the name: blackBirch.
Hardware
The camera system is based on a Raspberry Pi 2 Model B with a NoIR camera module attached. The power is supplied by a USB power bank of 10000mAh capacity. The touchscreen is a 4” screen connected with HDMI and though the Pi’s GPIO connector. The only other thing I have used was a 90-degree elbow HDMI connector to save some space. In addition of the Pi and the camera module, the following components, all available on amazon, were used in the camera:
- Poweradd EnergyCell 10000mAh Portable Charger Ultra-Compact Size Power Bank
- Smraza Raspberry Pi 4 Touch Screen with Case & Cooling Fan
- CKANDAY 7 Pack HDMI Angled Adapter
The camera body was built out of ½” birch wood and the panels were made from 1/8” black ABS (item number 8586K361 at McMaster-Carr) while the mounting screws came from a jeweller’s screw variety pack. The ABS panels were CNC routed and so were the vertical birch posts to match the curvature of the panel corner (with more or less success). The bottom of the camera has a ¼”-20 threaded metal insert press-fit and epoxied into a hole, so the camera can be mounted on a tripod. The metal insert, commonly referred to as a T-Nut, was from the hardware store. The ABS has received a brushed finish using steel wool, while the birch parts got a satin acrylic varnish. The front panel of the camera, resembling a very very flat lens, was CNC-milled out ABS. Under the ‘lens’ is a 1/16” thick aluminum plate with a lens hole serving no purpose other than a cosmetic one.
Software
The camera hardware is only as good as the software driving it. The Pi has a basic Raspberry Pi OS installed with additional modules needed by the camera application, as discussed a bit later. My design philosophy of the camera software was to keep things simple. A method to adjust the shutter speed, set the duration of and invoke preview, snap a photo, show a histogram, and … something I wanted to do for a long time: implement a crude ‘frame averaging’ feature.
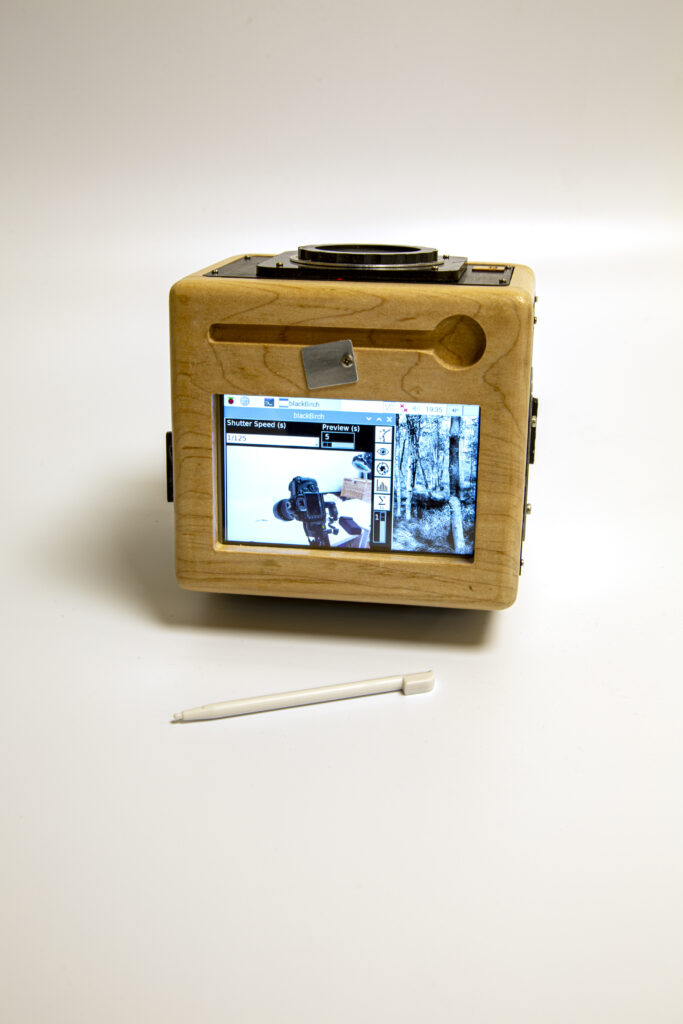
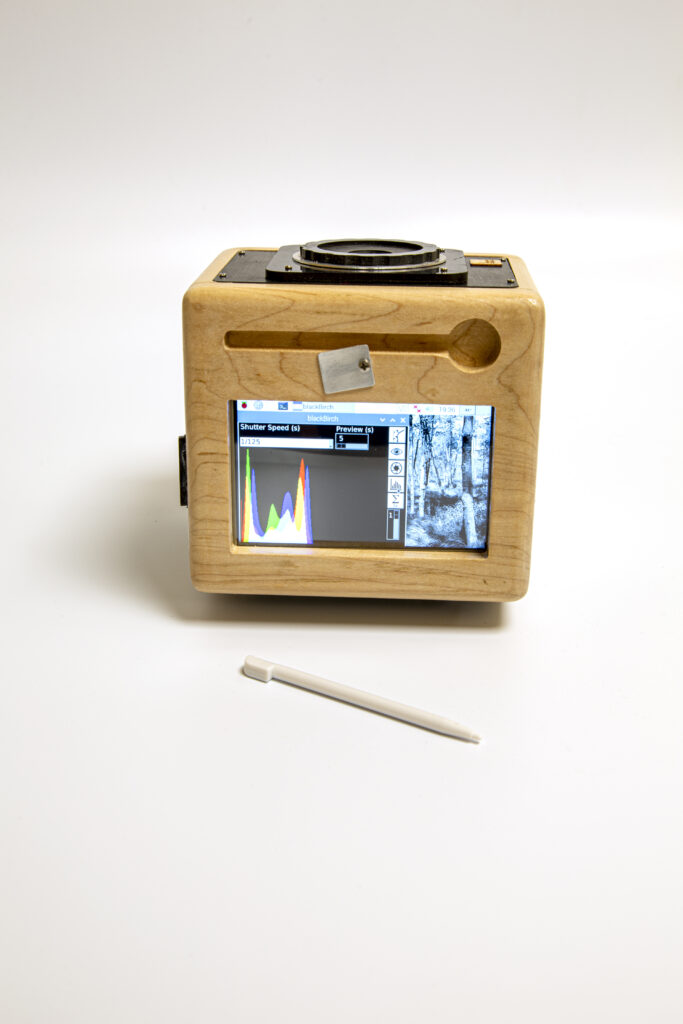
The camera app was written in Python and Tk, without any complicated code-wrangling. The source code can be found at the bottom, of the article. The upper portion of the app’s screen enables the change of shutter speed via a dropdown list, and next to is a slider to adjust the duration of the preview. The main portion of the app’s screen real estate is devoted to the post-capture view of the photo or its histogram. While the right side contains the buttons. From top to bottom: a blackBirch logo, preview, shutter, histogram and the ‘frame averaging’ button and its slider to set the number of frames. In more detail:
- The preview button invokes picamera’s preview mode, taking up the whole LCD screen. The preview is shown for a number of seconds, set by the preview slider.
- The shutter button invokes picamera with the shutter speed and other settings and saves the image into a folder. Afterward, a thumbnail is created and it is shown in the post-capture view area.
- The histogram option computer the R-G-B histogram of the image using ImageMagick and displays it in the app, replacing the captured image.
- The ‘frame-averaging’ option captures a number of images, set by the slider below the button, and used ImageMagick to calculate the ‘mean’ of the image set, thus, in a way, averaging the sequence. Mainly useful for smoothing out flowing water or clouds in the sky.
The implementation details for all this can be found by examining the source code.
Performance
Of course, the most important part, does the whole thing work?!?
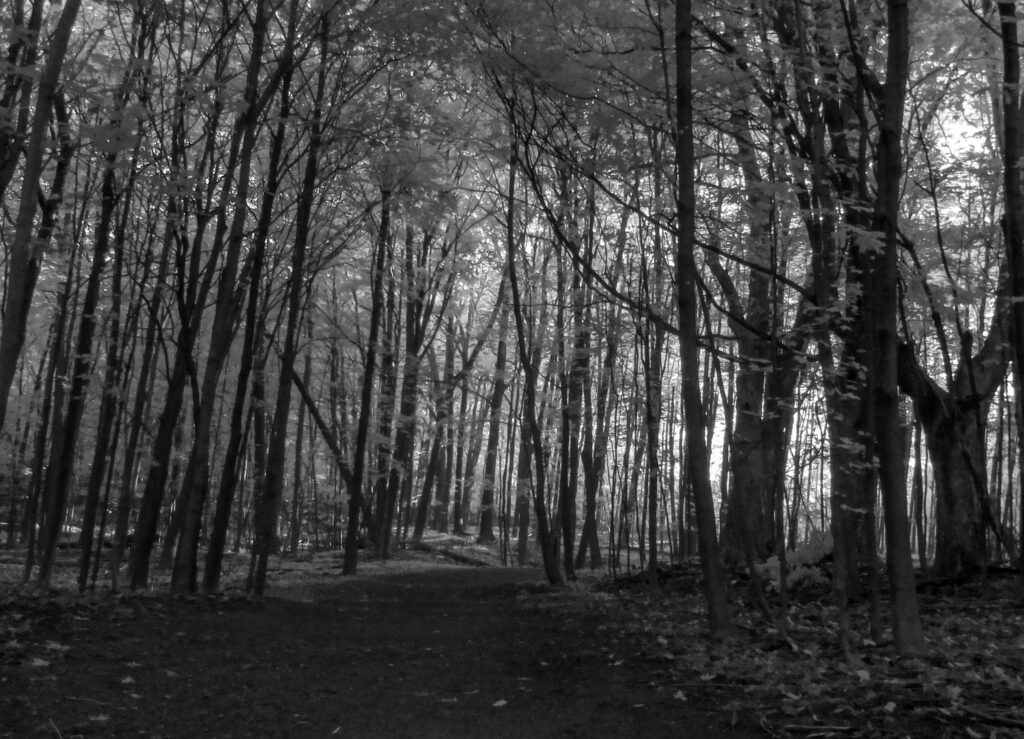
I took the camera out for a walk in the woods, in this pandemic world, where we can’t really wander too far from our houses. The goal of the trip was to see what is possible to capture and evaluate the performance of the battery pack. The walk took about an hour, and I am happy to report that the battery pack lasted. I guess, it can run the Pi for 4-5 hours at least.
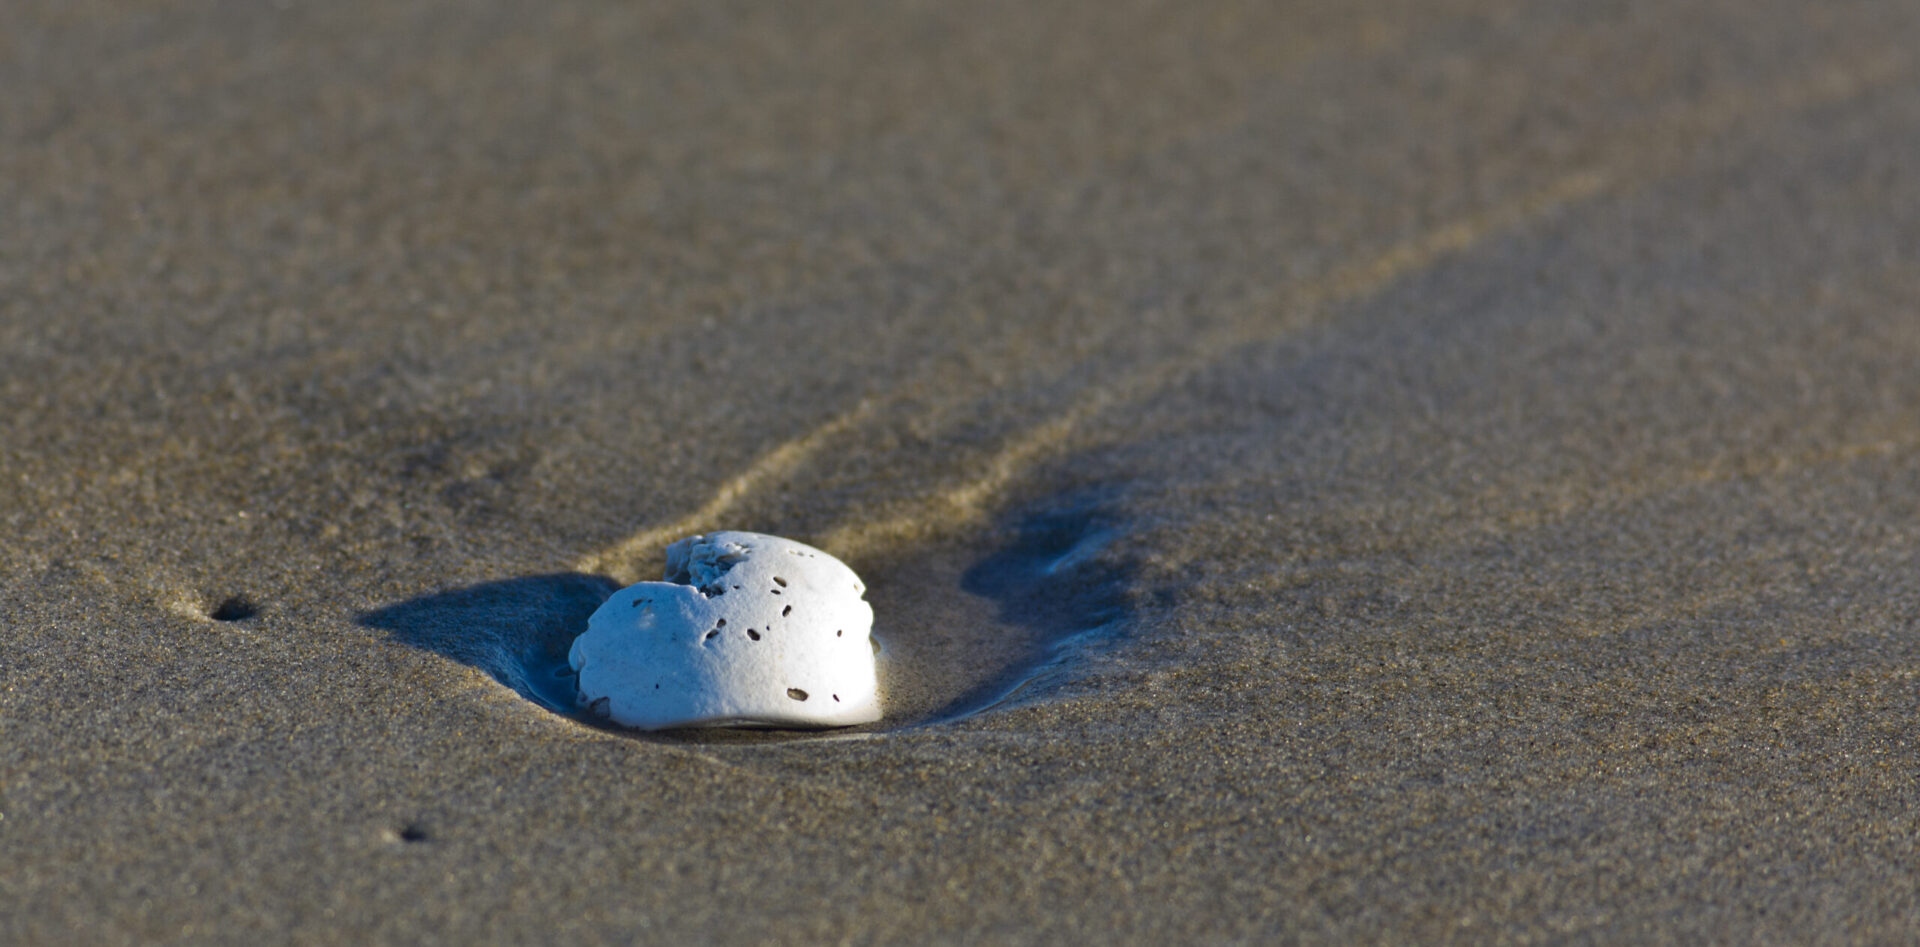
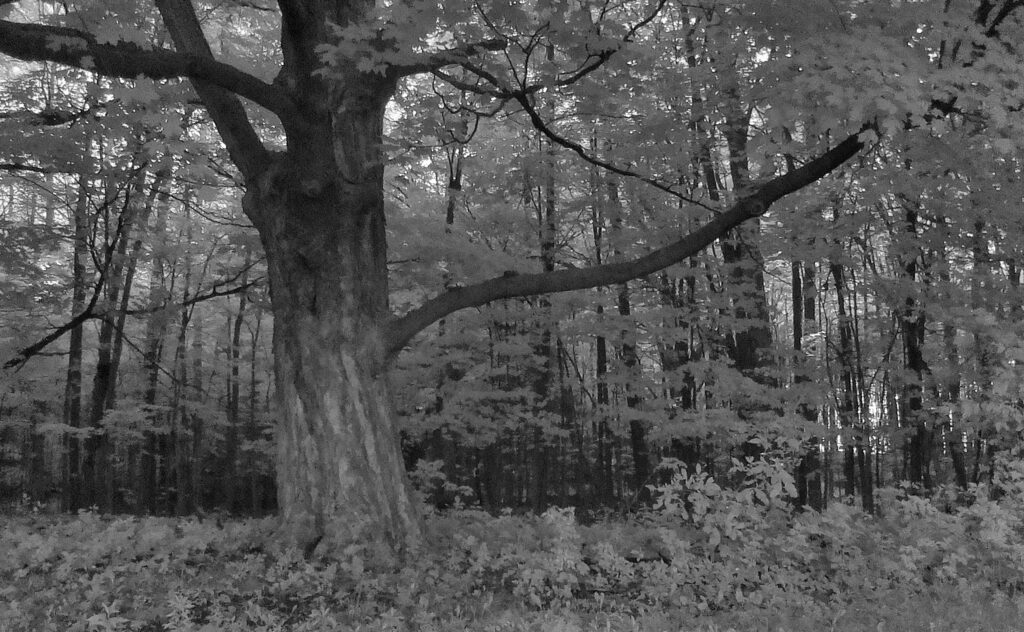
Although the NoIR camera module captures visible light in addition to part of the infrared spectrum, I prefer to convert most of the images into black and white.
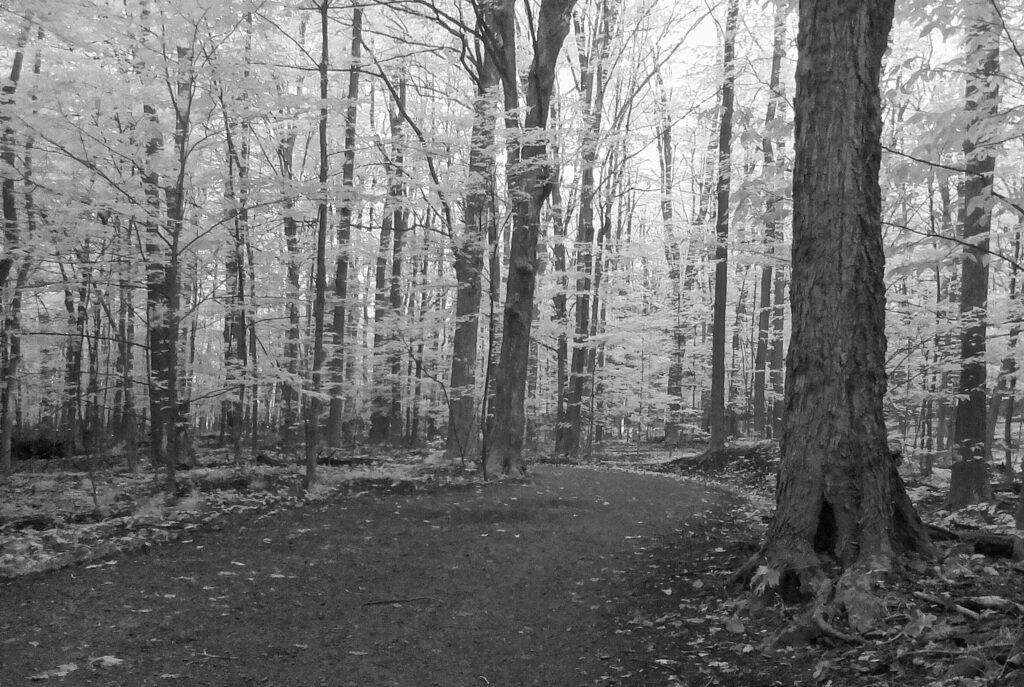
A capture using the frame-averaging option, note how it renders the surface of the lake; smooth with blurred reflection of the trees in the background.

All in all, I am quite satisfied with the experience of using the camera. It is understood that it cannot take the lead in the high megapixel race, but it provides enjoyment in capturing the world around us. Which is what photography is all about, at least for me…
Thank you for reading this short article. I hope it provides you with an inspiration to create your own shell and housing for your Pi and its camera module!
Source code
The Python source code can be found by clicking on the link.