
The work slowly progresses on my Eastern New England logging-inspired model railroad. With the addition of a water tower (or tank), the motive power now can make it up the branch line without stopping for water. The water tower is rather atypical; the ones built in New England were mostly fully enclosed so they can be heated during the long winter months. This tower is not so, because it has other, hmmm, more naughty purposes.
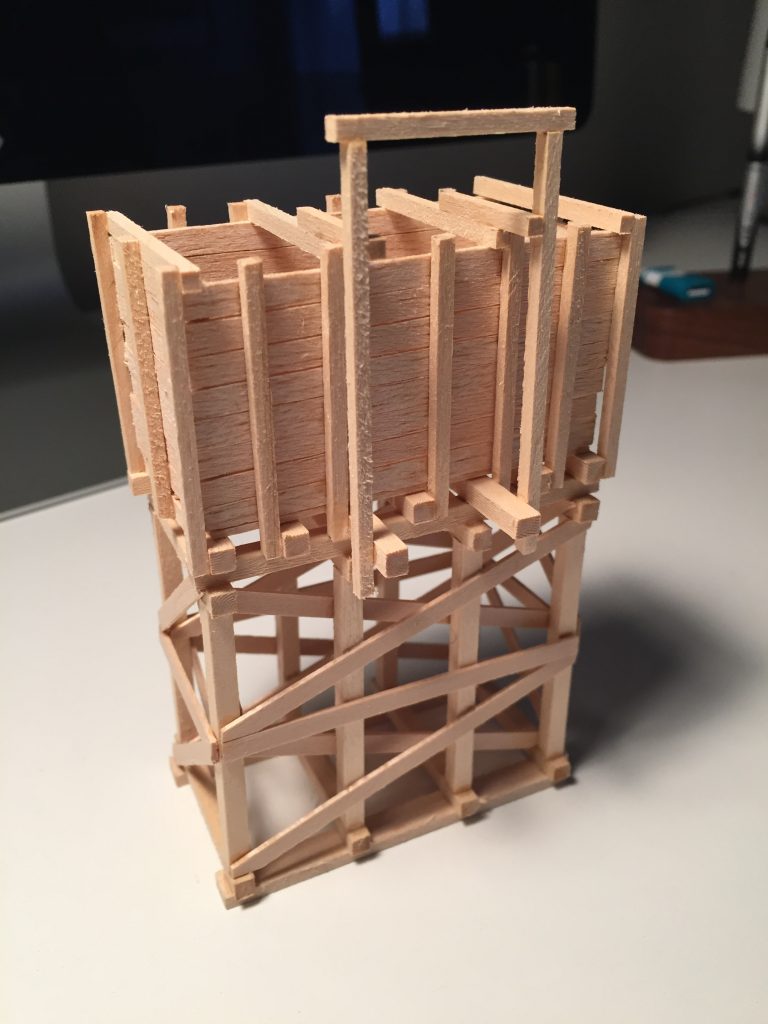
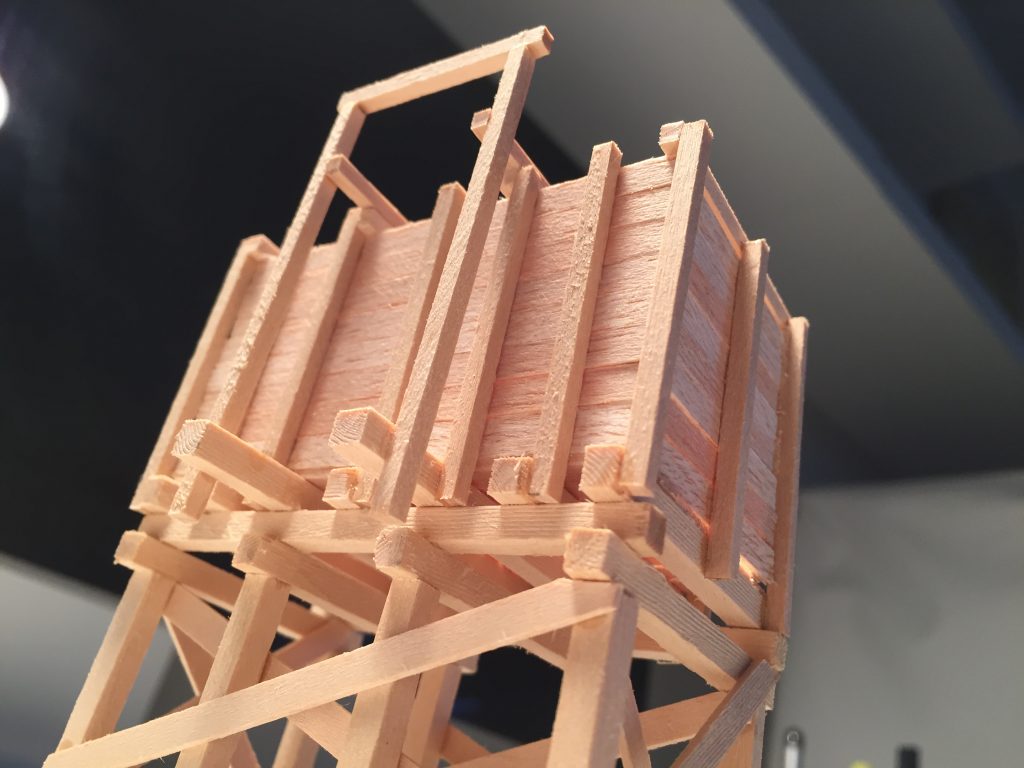
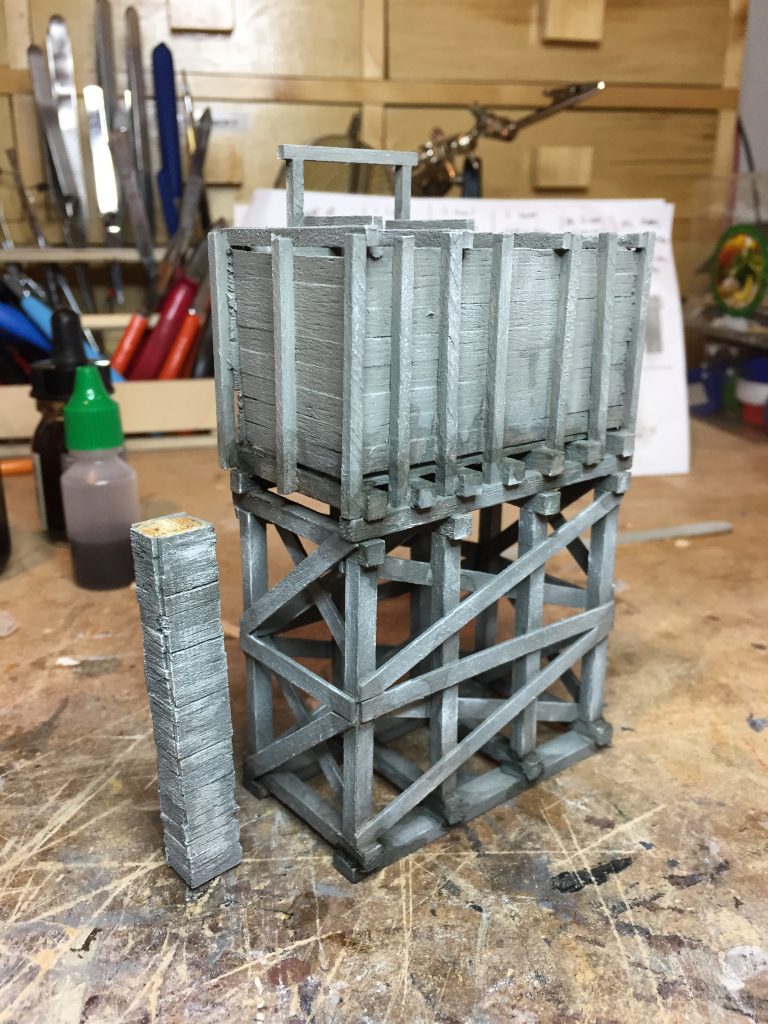
The preliminary plans for the tower came from the October 1973 issue of Model Railroader, which has a measured drawing of a similar structure originally located in the Northwest. This type of water tower has been the subject of many model railroad articles and built many times. As recently as the 2007 issue of On30 Annual features a built that I have to admit caught my attention. My model railroad is being constructed in 1:48 scale (O scale) on a 2 ft by 4 ft module. Due to space restrictions, I had to selectively reduce the dimensions of the model to fit in the space available. The tower was built mainly from basswood (structural members) and balsa wood (planking). The next few photos show its just-constructed state.
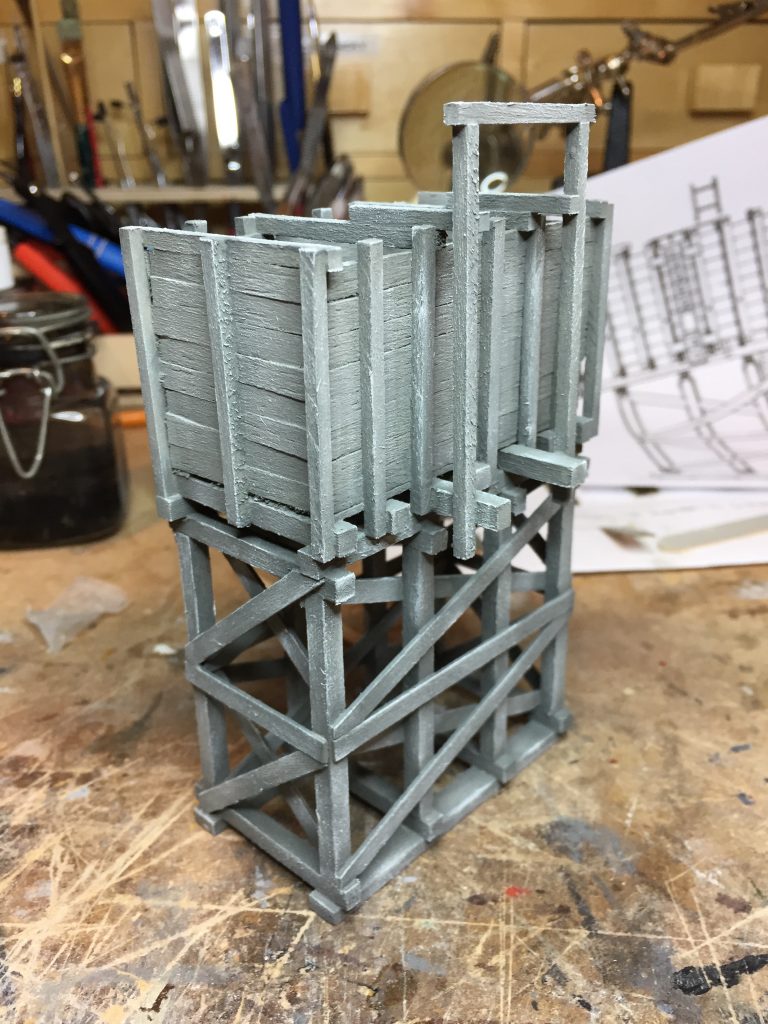
I have envisioned it to be fairly weather-beaten but not deteriorated, still in a functional state. Afterall, weather in New England can leave its mark on anything that is exposed to its wrath. Maybe because I don’t have many positive experiences with staining wood to look aged (e.g. the alcohol-india ink bath for some reason does not look good to me), I like to paint my wood in layers and build up the effect I am after, in the style of Troels Kirk, treating the wood as a 3D canvas. As you can see from the figures above, the wood receives some distressing from drawing a razor saw blade to impress grooves and grain and the ends of the timbers have appropriate grain along an arc to represent growth rings of cut wood.
The base colour is a warm grey (or gray, if you prefer it that way) acrylic craft paint applied in thin layers. Once good coverage was achieved, a somewhat darker grey (with an addition of a touch of black), was applied in areas of the model that would be in shade. When completely dried, the structure way lightly dry brushed with white acrylic paint to bring out the texture of the wood grain, as shown in the photos below.
At this point I am willing to use of the alcohol-diluted india ink to shade areas of the tank where I perceive that the wood should be more wet or darker; occasional leaking joints between planks, along the bottom of the tank, on flat horizontal areas where water pools and near the concrete foundation. This darker layer serves as the backdrop for a subsequent step.
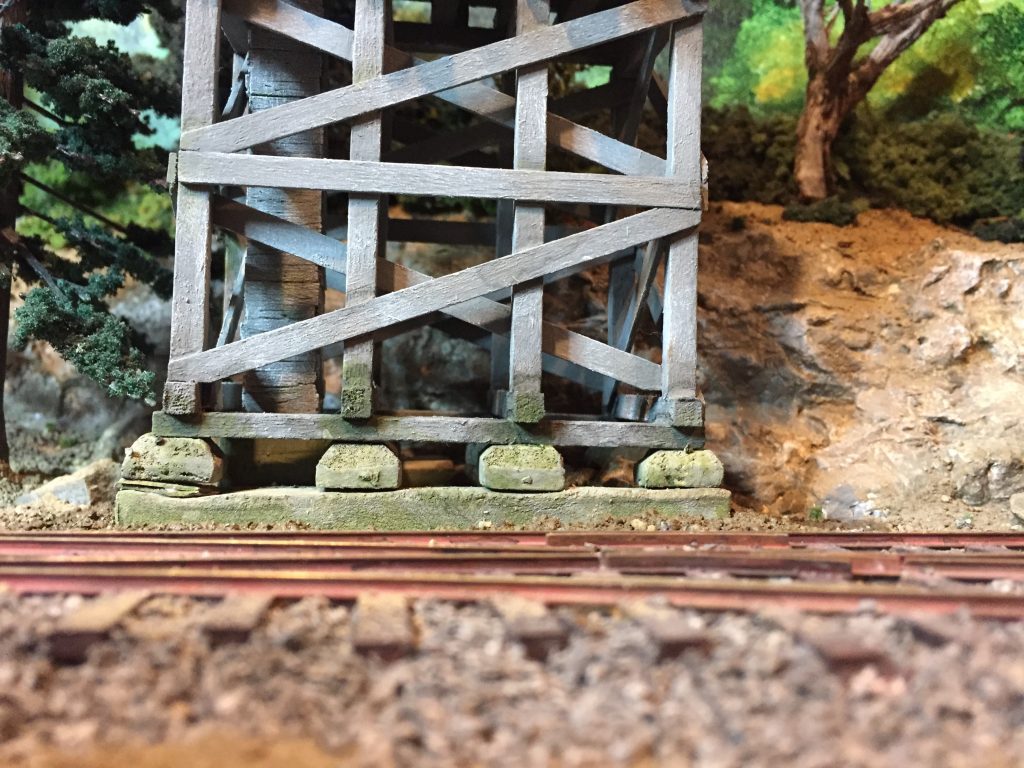
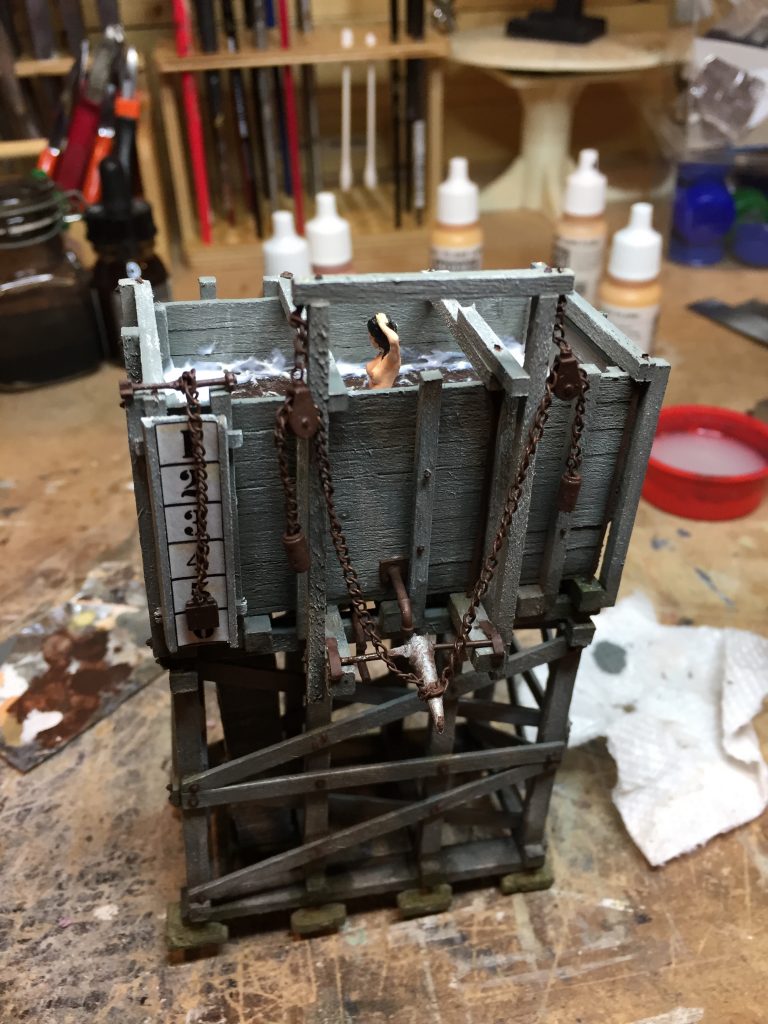
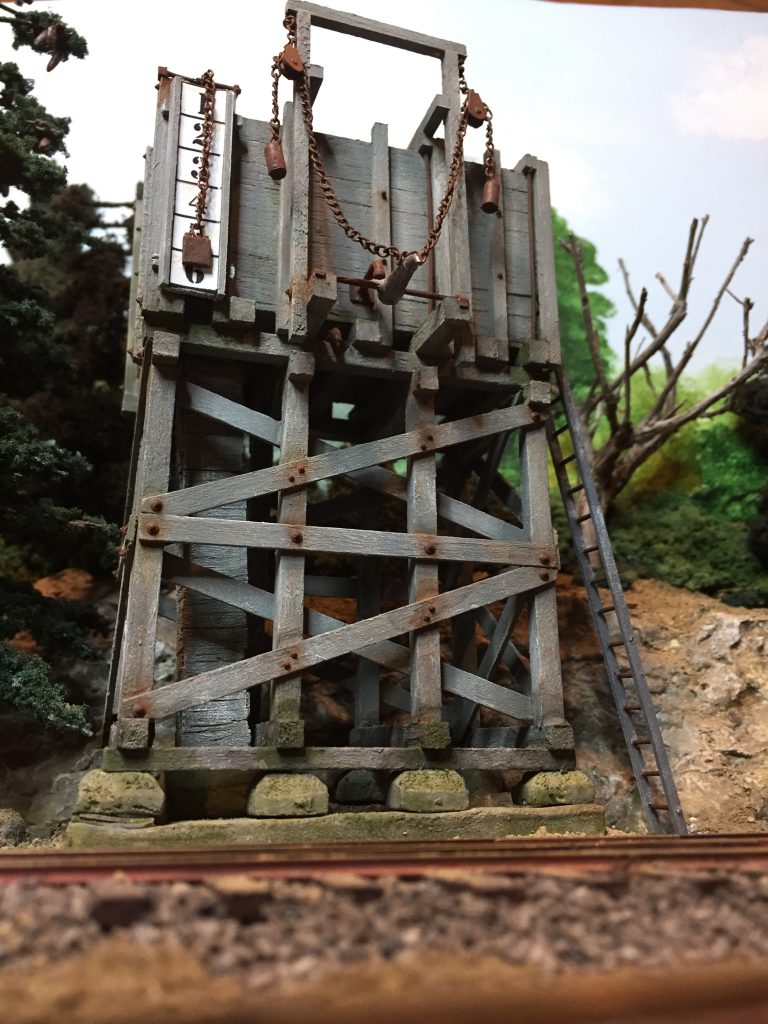
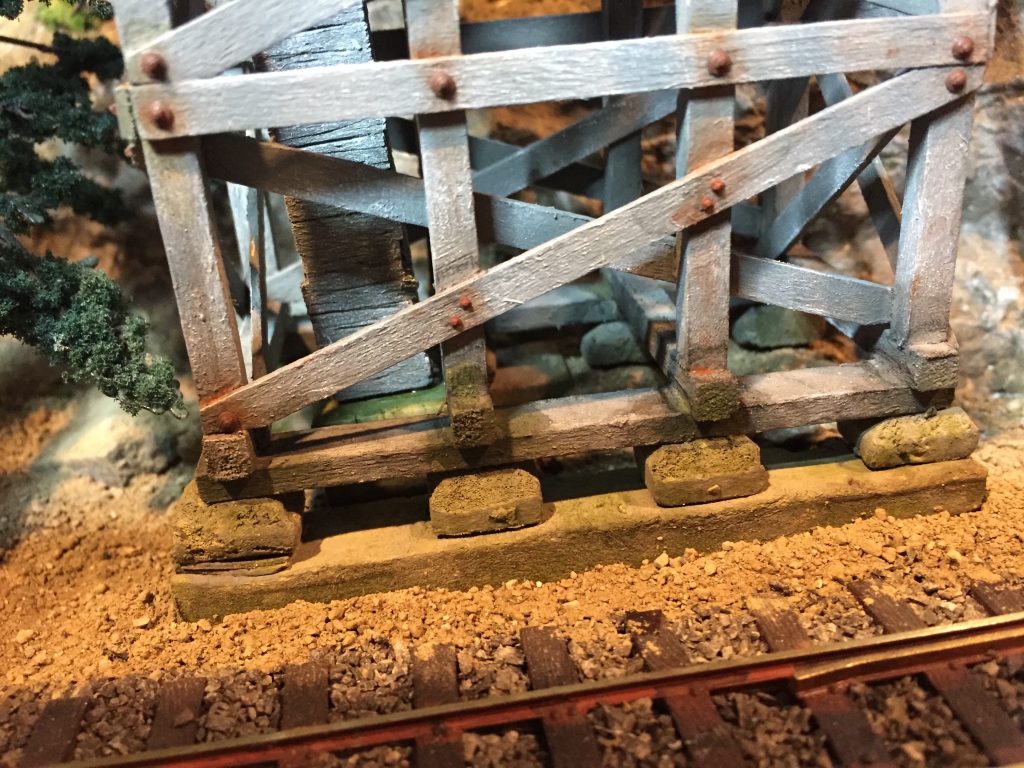
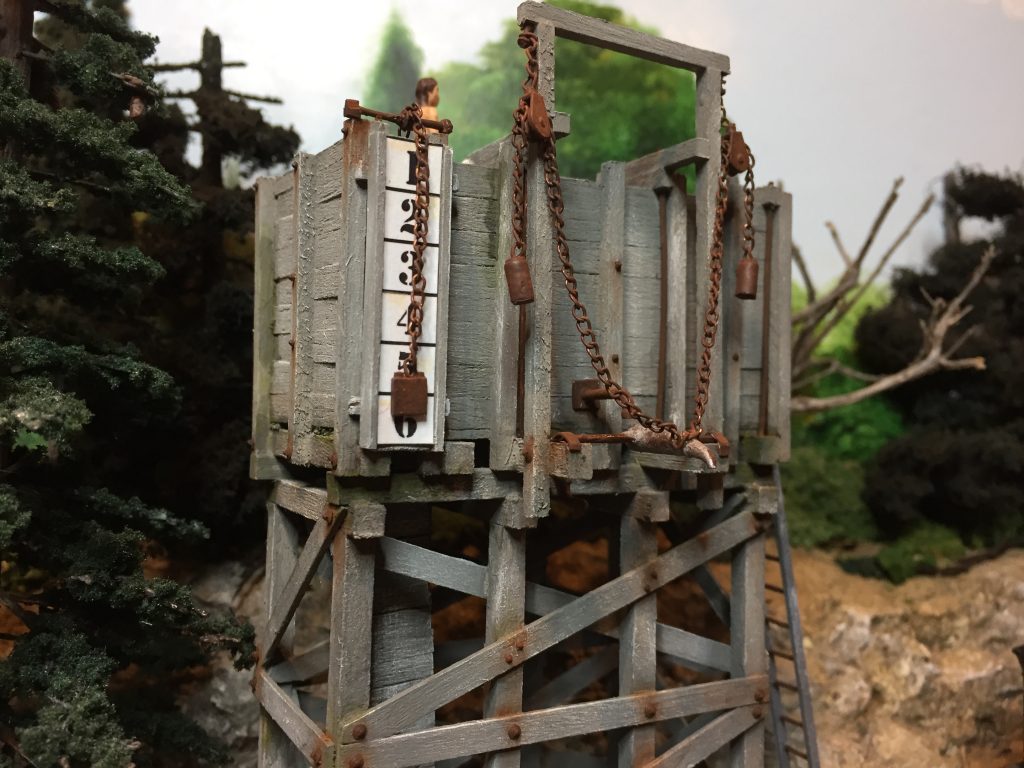
An initial siting of the structure was done along with construction of the foundation. The ‘concrete’ piers and the two grade beams were made from pink foam insulation, which was primed, painted and weathered. The water level indicator was affixed to the structure (the 1,2,3,4,5,6-thing), which was just some numbers on a printed paper.
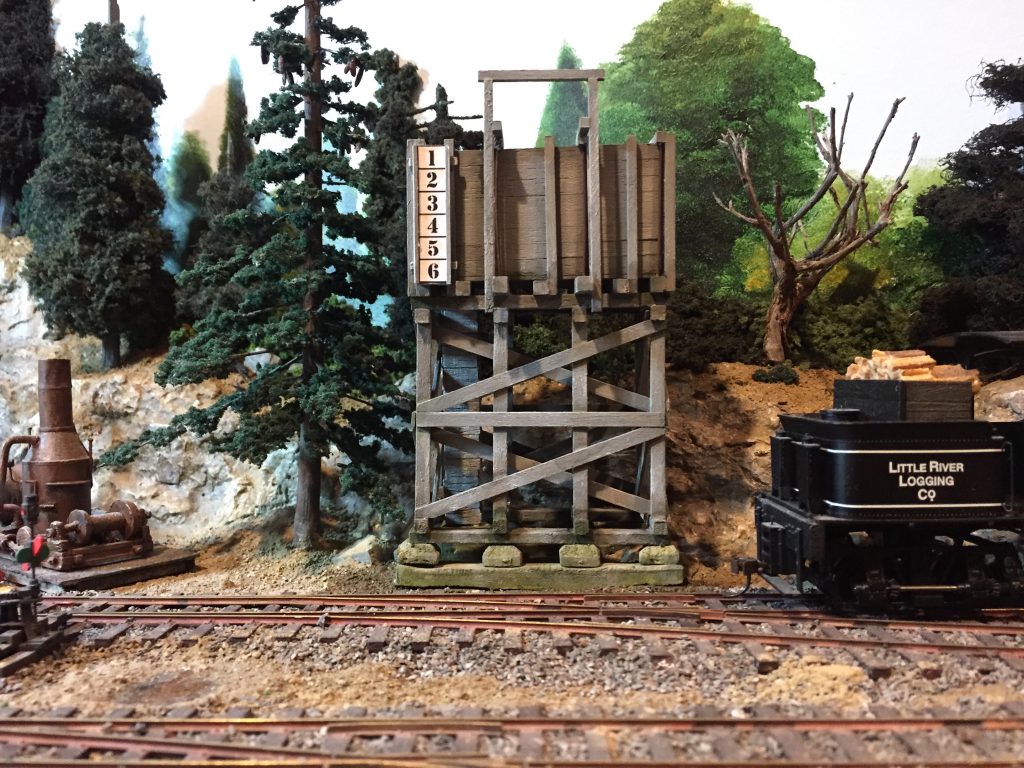
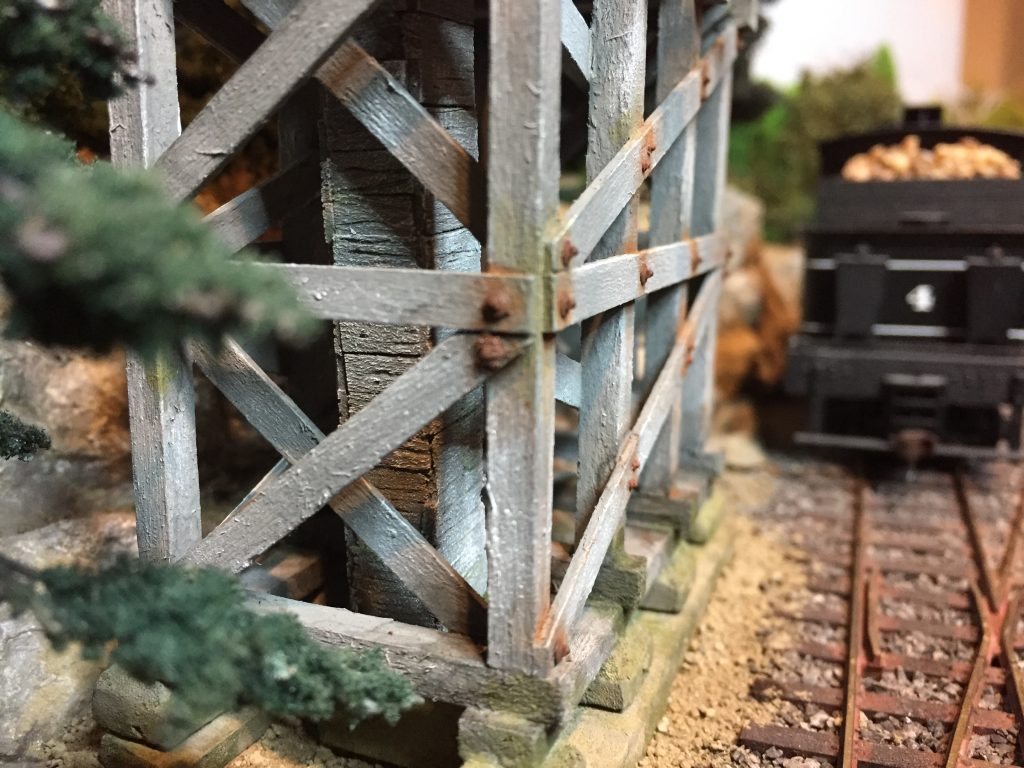
Mould, moss and lichen grow wherever there is water and moisture. Areas of the structure what are moist received a light coat of AK Interactive’s Slimy Grime Light and Dark enamel-based washes, as seen on the photos below. At this point the hardware that makes the water tower operational was done as well. The spout, pulleys, counter weights and other hardware was designed on a computer and 3D printed in resin, while the chain is a jewellery-supply store find. All hardware received a primer coat of grey and painted a brownish acrylic colour. Attention was given to the spout, which was painted brown, then AK Interactive’s Chipping Fluid was applied and once dry, a coat of Tamiya flat aluminum was painted on to represent sheet metal. Once the top coat of aluminium was dry, a moist stiff brush was used to rub off the aluminum colour and allow the rusty brown to show through, just as in real life. Attention was given to remove paint where it would normally erode; on the sides and bottom where water pools before dripping off. Finally, nuts, bolts and washers (plastic castings from Grandt Line, I believe) were applied to the model at appropriate locations to represent structural connections. Some imagination was used to position the pipes leading to the spout, which may or may not be where they supposed to be, if you know what I mean…if you didn’t notice anything odd, then everything is just fine!
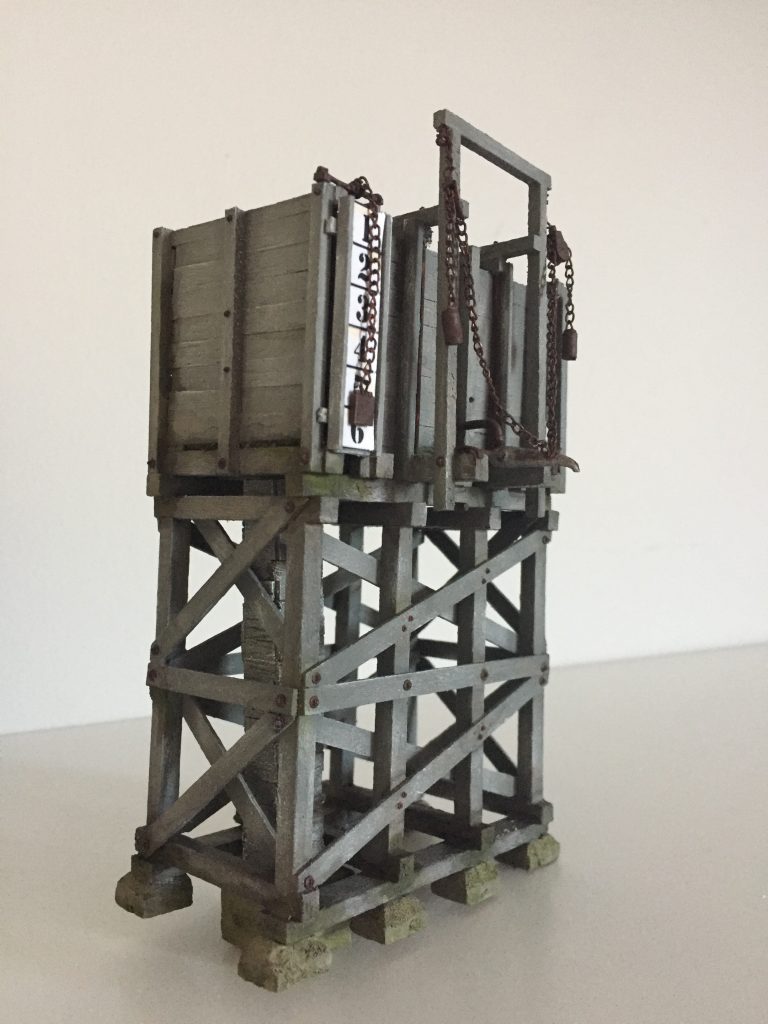
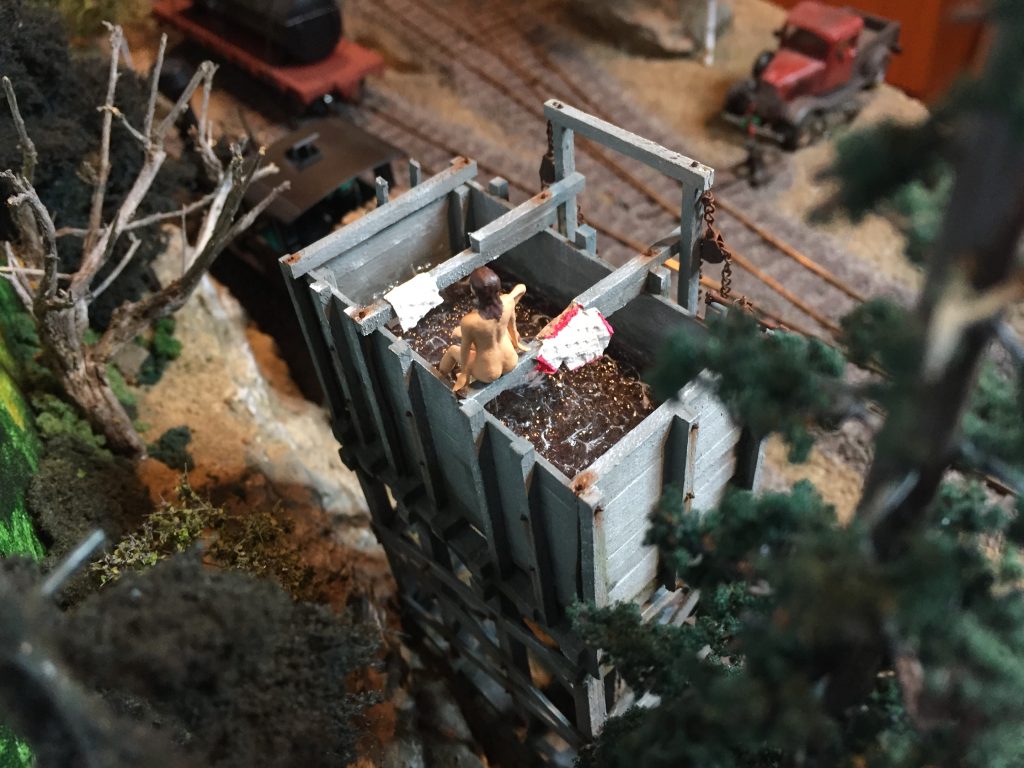
The water tower was almost done, but I wanted to add an extra twist. The tower featured in the 2007 On30 Annual had three lovely ladies taking a bath and destabilizing the structure by cutting a few structural members. I believe the inspiration of sirens came from and old TV show (Petticoat Junction). I had to do something similar. The 3D printer was on again, churning out two lovely figures that I have designed and sculpted. One of them is sitting on the top rafter while the other one is just emerging from the murky water of the tank. The water surface was created using an 1/8 thick acrylic sheet that was back-painted using a brownish grey colour. Holes were drilled to allow the figure to be partially inserted. Once the figure was in, artist’s gel medium was dappled on the surface to represent waves, which were dry-brushed white to represent froth and foam.
Once both ladies were painted using Vallejo Model Color acrylic paints, the complete structure was weathered using pigments; reddish brown in a few shades for the rust on the pulleys and chains and some grey on the wooden parts. The final siting of the model on the railroad module completed this lovely little build. I hope you have enjoyed the images and my narration that came with them. Let me conclude with few more photos…
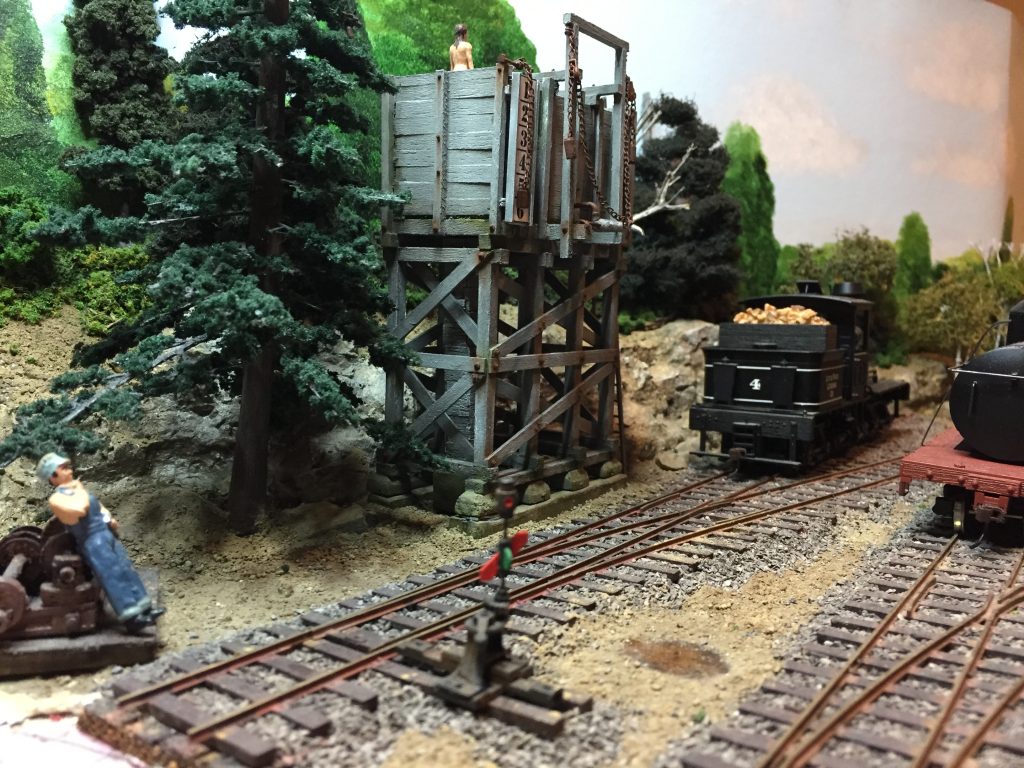
The geared Shay locomotive can now be filled with fresh spring water.
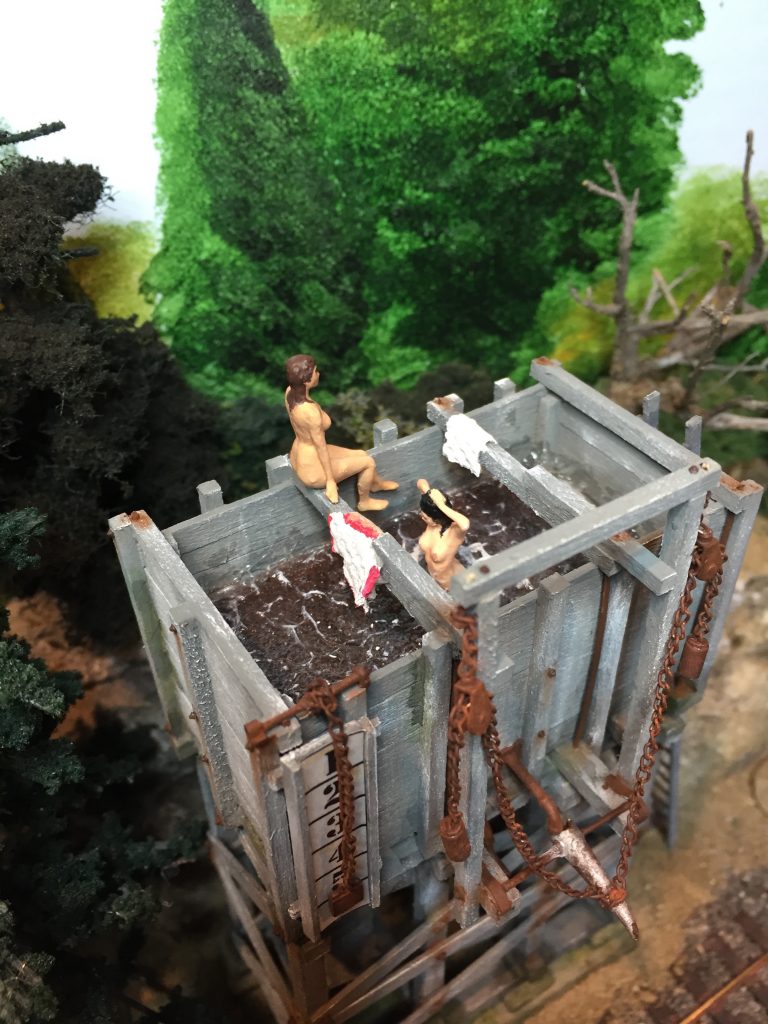
Bathing beauties, robin’s eye view.
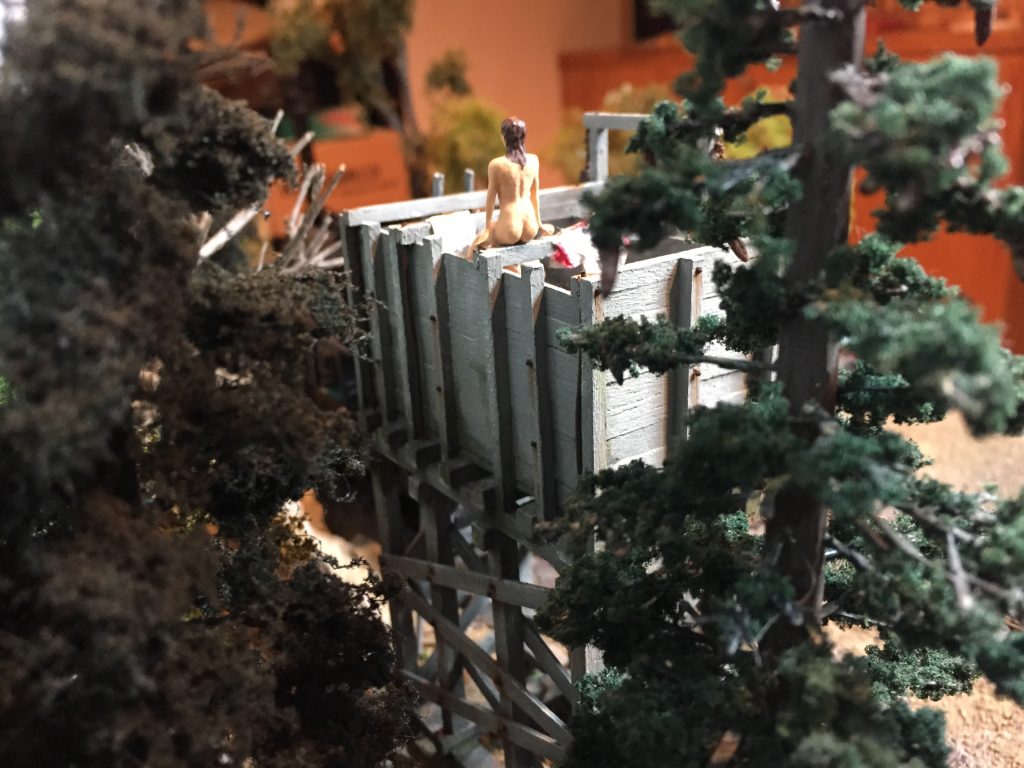
Bathing beauties, view from the ridge behind the tower.
Bathing beauties, eagle’s eye view.
View up from the track level.
Insulated water supply (in the center) and nuts-bolts-washers details.
The completed water tower.